Infrared TV Remote Automation with OpenMQTTGateway (OMG) and Home Assistant
In this post, I’ll describe the steps to control a 55” TCL TV from Home Assistant. The initial goal was to simply turn it on and off as I’m using an Nvidia Shield as the primary interface. I decided to control it via a smart plug (for power) and infrared for specific commands, effectively emulating the remote control.
Prerequisites
Those prerequisites contains a list of tools (hard, firm and software) that I decided to go with. You can for example switch the ESP32 controller for an ESP8266 (a Wemos D1 mini). This ESP32-S3 is overkill (the USB-C interface though 😍) for this task but that’s what I had on hand.
Hardware
Software
Server apps
All apps are deployed via Docker. You can use any MQTT broker but I chose Mosquitto for its support.
Desktop apps
Firmware
Installation
For the ESP32 firmware, I decided to go with OpenMQTTGateway (OMG) for its already built-in IR controller integration. As of writing this post, the current version is 1.6.0 which does not support the S3-based boards out-of-the-box (I had to use the latest platform).
You can read on their docs how to set it up (> Set-up > (Option 3) Upload your configurations). I will however describe the custom environment INI file configuration I am using to set it up:
1
2
3
4
5
6
7
8
9
10
11
12
13
14
15
16
17
18
19
20
21
22
23
24
25
26
27
28
29
30
31
32
33
34
35
[platformio]
default_envs = lolin-s3-mini-ir

[env:lolin-s3-mini-ir]
; When the recommended platform version will be updated (currently 6.1.0),
; you will be able to use `${com.esp32_platform}` instead of `espressif32`
platform = espressif32
board = lolin_s3_mini
board_build.partitions = min_spiffs.csv
lib_deps =
  ${com-esp.lib_deps}
  ${libraries.irremoteesp}
  ${libraries.wifimanager32}
build_flags =
  ${com-esp.build_flags}
  '-DARDUINO_USB_CDC_ON_BOOT=1'
; *** OpenMQTTGateway Config ***
  '-DGateway_Name="<GATEWAY_NAME>"'
; *** OpenMQTTGateway Modules ***
  '-DZgatewayIR="IR"'
  '-DIR_RECEIVER_GPIO=16'           ; for ESP32 Wemos S3 mini board and Wemos IR controller shield
  '-DIR_EMITTER_GPIO=18'            ; for ESP32 Wemos S3 mini board and Wemos IR controller shield
  '-DNO_INT_TEMP_READING=true'      ; Internal temperature reading not building on ESP32 C3 or S3
; *** Custom Settings ***
; *** Wi-Fi section ***
  '-DESPWifiManualSetup=true'
  '-Dwifi_ssid="<WIFI_SSID>"'
  '-Dwifi_password="<WIFI_PASSWORD>"'
; *** MQTT section ***
  '-DBase_Topic="<BASE_TOPIC>/"'    ; the `/` is important
  '-DvalueAsATopic=true'            ; MQTT topic includes model and device
  '-DMQTT_USER="<MQTT_USERNAME>"'
  '-DMQTT_PASS="<MQTT_PASSWORD>"'
  '-DMQTT_SERVER="<MQTT_SERVER>"'
custom_description = IR Controller
You need to replace all placeholders (<...>) for it to work. Make sure to setup the valid GPIO pins according to your configuration (hardware-wise).
Some settings might not work for you since they are board-specific or dependant on your environment. For example, my IoT-dedicated network’s SSID is hidden, so as I am writing this post, entering the Wi-Fi SSID and password directly won’t work. I had to use OMG’s built-in setup interface to setup my credentials.
Once Platform.io / OMG is configured, you can build your firmware and upload it to the board.
Usage
Once your firmware is installed, you can reset your board and let it boot up. In MQTT (via “MQTT Explorer” listed above), if everything is setup correctly, you should see two new topics:
<BASE_TOPIC>/<GATEWAY_NAME>/LWT<BASE_TOPIC>/<GATEWAY_NAME>/version
After a few seconds (every 120s in fact), you should see a third topic <BASE_TOPIC>/<GATEWAY_NAME>/SYStoMQTT. This topic contains data related to your device (memory, wifi, uptime…).
You can follow this guide to read IR codes emitted from the remote when pressing a button and send commands to your TV.
In a nutshell, when the shield receives an IR frame, it is converted to JSON and publish to a specific topic: <BASE_TOPIC>/<GATEWAY_NAME>/IRtoMQTT/<value>
1
2
3
4
5
6
7
8
{
  "value": 864045,
  "protocol": 29,
  "bits": 24,
  "hex": "0xD2F2D",
  "protocol_name": "NIKAI",
  "raw": "3990,3986,508,1984,508,1982,508,1984,510,1984,508,992,510,990,508,1986,532,968,504,1984,510,1984,506,994,508,1984,508,992,508,992,510,992,534,968,508,1984,504,1984,534,992,484,1984,506,992,508,994,508,2008,484,994,532,8464,3990,3986,484,1982,532,1984,484,2008,484,1984,508,994,532,970,506,1986,508,994,506,2008,510,1960,508,1016,484,1986,508,990,510,994,506,994,532,990,484,2008,484,2008,484,996,530,1986,484,990,510,1018,482"
}
You can use the protocol_name and value in your commands to send the correct IR frame, emulating your button press.
IR Examples
Turn TV ON/OFF
I can emulate a press on the power button via sending a message on the broker.
MQTT topic: <BASE_TOPIC>/<GATEWAY_NAME>/commands/MQTTtoIR
1
{ "value": 876330, "protocol_name": "NIKAI" }
Changing input (Button +)
MQTT topic: <BASE_TOPIC>/<GATEWAY_NAME>/commands/MQTTtoIR
1
{ "value": 864045, "protocol_name": "NIKAI" }
Changing input (Button -)
1
{ "value": 868140, "protocol_name": "NIKAI" }
MQTT topic: <BASE_TOPIC>/<GATEWAY_NAME>/commands/MQTTtoIR
Home Assistant
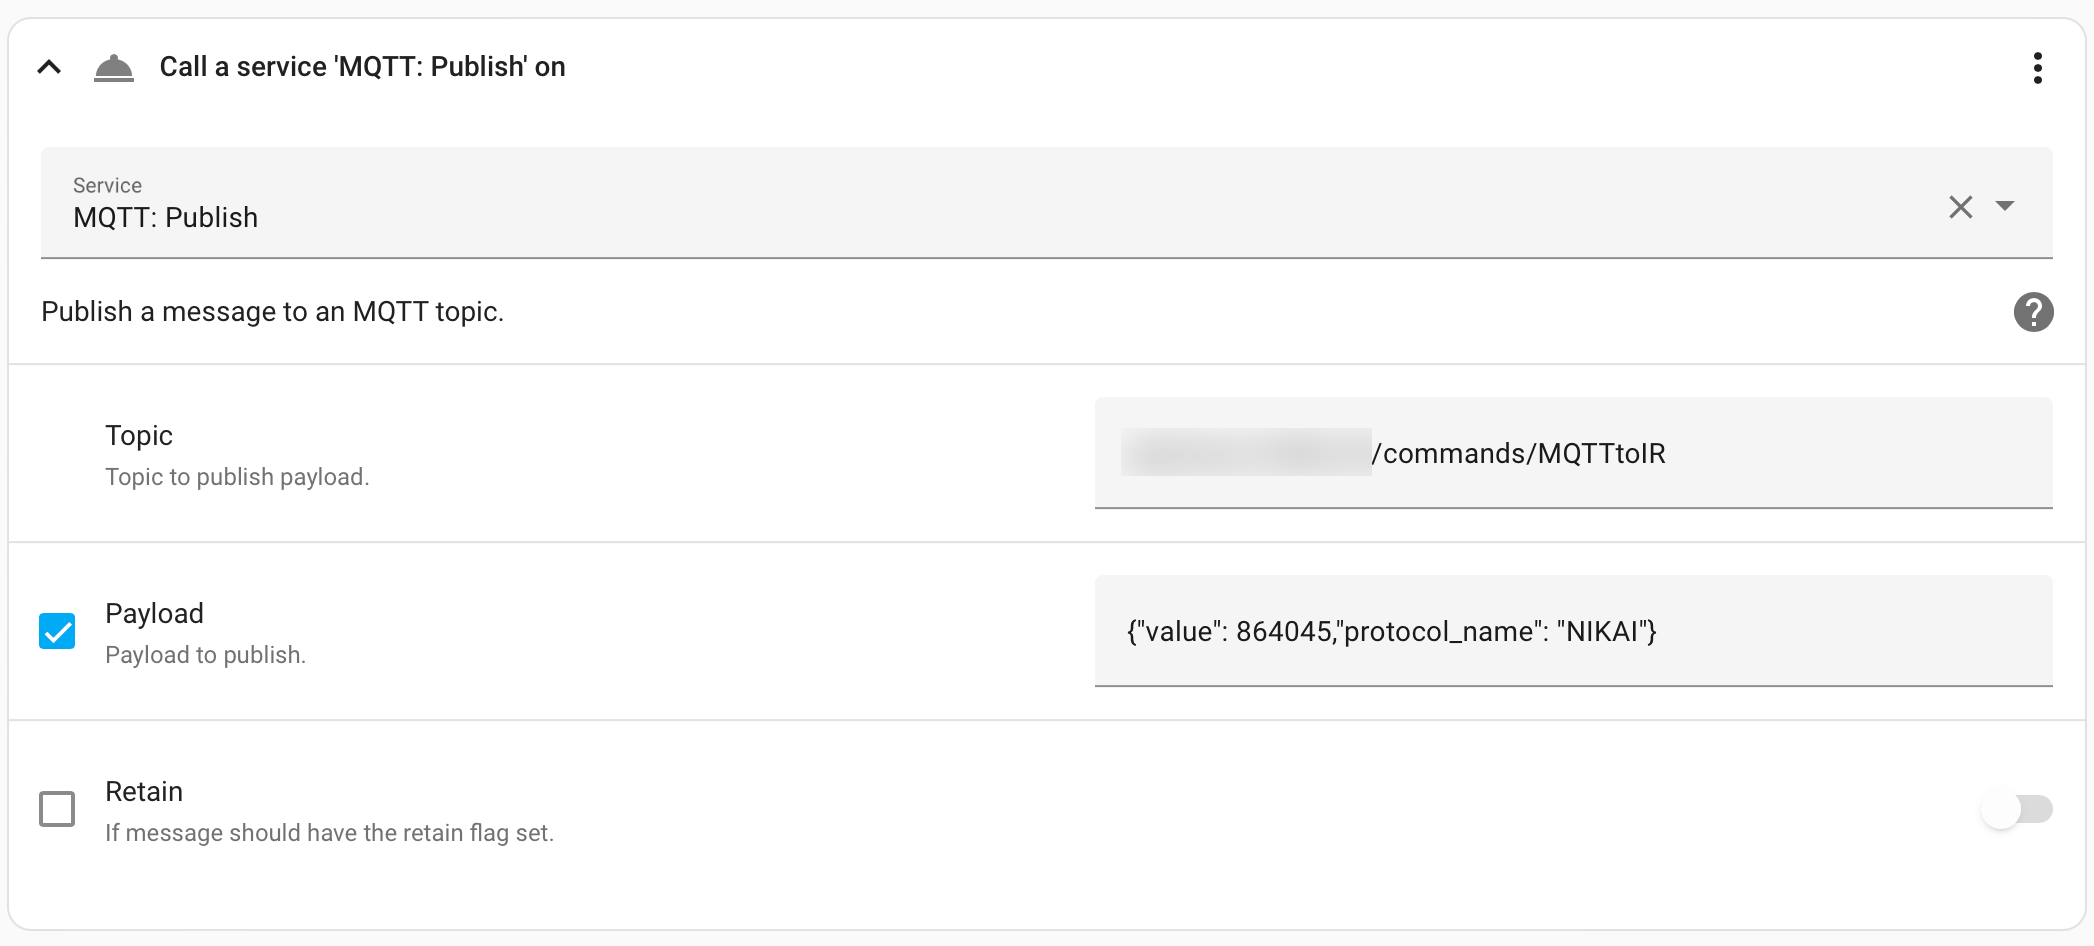
In Home Assistant (HA), we can use automation to publish a message on those specific topics seen above.
In Actions, you need to select Call service then MQTT Publish. Enter the correct topic and payload as JSON. I did not set any Quality-of-Service (QoS) nor to retain those messages as shown below:
I have an automation to turn ON my smart plug first then wait for the ESP32 (powered by one of the Shield’s USB port) to boot and finally turning ON both the TV and the Nvidia Shield (via the Android TV Remote integration in Home-Assistant).
Same to turn if OFF. It results in a cleaner shutdown than turning OFF the smart plug directly.